Introduction
Holding a bow and arrow correctly is foundational to achieving accuracy and consistency in archery. Whether you’re a beginner just getting started or an enthusiastic archer looking to refine your technique, understanding how to hold the bow when shooting is critical. Furthermore, a proper bow grip not only improves your performance but also helps prevent injuries and enhances overall comfort during practice and competition.
In this guide, we will delve into the importance of a proper bow grip, explore the different types of grips, offer a step-by-step tutorial on holding the bow correctly, and provide tips to improve your grip for better shooting performance.
The Importance of Proper Bow Grip in Archery
The way you hold your bow can significantly influence your shooting accuracy and overall archery experience. A proper bow grip ensures that the energy transfer from the bow to the arrow is smooth and efficient, leading to better shot placement. Additionally, a correct grip helps to minimize torque and other inconsistencies that can disrupt your aim.
Effects on Accuracy and Consistency
- Accuracy: An improper grip can cause lateral movements and twists, making your shots less predictable. A stable grip keeps the bow steady, ensuring that your arrows hit the target more consistently.
- Consistency: When your grip is consistent, your shots will be too. Variations in how you hold the bow lead to variations in your shots, making it challenging to improve your performance.
Fundamental Types of Bow Grips
There are several types of bow grips, each with its advantages and specific use cases. Here are the fundamental types:
Low Wrist Grip
Description: The knuckles are at a slight angle, and the wrist is relatively low.
Effect: This grip minimizes torque and provides a natural feel, offering better control and stability.
High Wrist Grip
Description: The knuckles are almost vertical, and the wrist is elevated.
Effect: This grip can provide a cleaner release but requires more muscle control, which might lead to fatigue.
Medium Wrist Grip
Description: A balanced grip where the wrist is neither too high nor too low.
Effect: This is often recommended for beginners as it offers a balanced approach between control and comfort.
Step-by-Step Guide on How to Hold the Bow Correctly
Follow these steps to ensure a proper bow grip:
Hand Placement
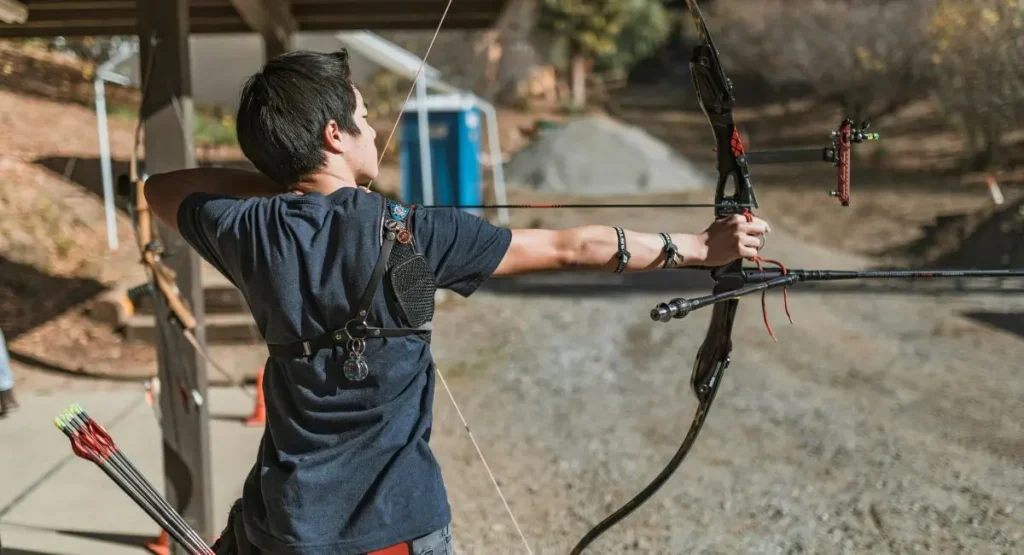
Place the meaty part of your thumb (thenar eminence) against the grip of the bow. The pressure should be distributed across this area rather than the palm.
Finger Positioning
Keep your fingers relaxed. Avoid wrapping them tightly around the bow. Ideally, only the thumb and forefinger should contact the bow, while other fingers lightly touch the riser.
Wrist Alignment
Ensure your wrist is in a neutral position. Avoid extreme angles as they can introduce torque.
Pressure Point
The pressure should be applied through the webbing between your thumb and forefinger. This allows for a stable yet relaxed grip.
Common Mistakes in Bow Grip and How to Avoid Them
Death Grip
Mistake: Gripping the bow too tightly.
Solution: Keep your grip relaxed and let the bow sit naturally in your hand.
Palm Contact
Mistake: Resting the bow against your palm.
Solution: Position the bow against the thumb pad instead of the palm to avoid unwanted torque.
Incorrect Wrist Position
Mistake: Bending the wrist too much.
Solution: Keep the wrist neutral to maintain a consistent shot.
Tips on Improving Your Grip for Better Shooting Performance
Practice with Visual Feedback
Use a mirror or record yourself to observe your grip and make adjustments as needed.
Strength and Flexibility Exercises
Strengthen your wrist and forearm muscles, and maintain flexibility to ensure a stable and comfortable grip.
Dry-Firing
Practice gripping the bow without shooting to focus solely on your grip technique.
The Role of a Correct Bow Grip in Injury Prevention and Overall Comfort
A proper bow grip significantly reduces the risk of injuries such as tendonitis or sprains, which can result from excessive strain due to an incorrect hand position. Moreover, a comfortable grip makes the entire shooting process more enjoyable, which is crucial for maintaining long-term interest and progress in archery.
Conclusion
Mastering the proper bow grip is essential for achieving accuracy, consistency, and comfort in archery. By understanding different types of grips, avoiding common mistakes, and following a structured approach to improving your grip, you can enhance your shooting performance and reduce injury risks.
Remember, practice makes perfect. Regularly review and tweak your grip technique and seek feedback from experienced archers or coaches. By dedicating time to perfect your bow grip, you’ll find yourself hitting the target more consistently and enjoying the art of archery even more.
Happy shooting!
Feel free to share your experiences and improvements with the community, and don’t hesitate to reach out for further tips and advice.
Frequently Asked Questions
How to hold a bow when shooting?
When holding a bow, place the meaty part of your thumb against the grip and keep your fingers relaxed. The thumb and forefinger should primarily contact the bow while the other fingers lightly touch the riser. Ensure your wrist is in a neutral position to avoid torque.
What is the best grip for shooting a bow?
The best grip depends on your comfort and shooting style. Generally, a low wrist grip minimizes torque and provides stability, making it suitable for most archers. Beginners often start with a medium wrist grip for a balanced approach between control and comfort.
How should you hold the bow when shooting quizlet?
On platforms like Quizlet, the general guidance remains the same: place the meaty part of your thumb against the grip, keep your fingers relaxed, and maintain a neutral wrist position. Avoid squeezing the bow too tightly to prevent unwanted torque.
What is the correct position for your bow arm when shooting?
Your bow arm should be fully extended but not locked at the elbow. The arm should be slightly bent to allow for a natural feel and to absorb any shocks from the shot. Keep your shoulder down and relaxed to maintain alignment and stability.
Do you tilt the bow when shooting?
Generally, the bow should be held vertically to ensure consistent shot placement. However, slight tilting can be used in specific shooting styles or to adjust for wind and other factors. Consistency is key, so practice your chosen method regularly.
How do you properly use a bow?
Proper use of a bow involves multiple steps: adopting a correct stance, nocking the arrow, drawing the bowstring back smoothly, anchoring the string at a consistent spot, aiming, and releasing cleanly. Focus on maintaining a relaxed yet firm grip, with a neutral wrist and extended bow arm. Regular practice and feedback from experienced archers or coaches will help refine your technique.
Recommended Articles
- The Ultimate Guide To Choosing Between Compound Bow vs Crossbow
- How To Carry A Bow – Tips & Techniques For Archers
- Ultimate Guide To Installing Compound Bow Arrow Rest
- The Ultimate Guide To The Best Archery Brands Of Compound Bows
- How To Utilize Recurve Bow Sights: A Comprehensive Guide
- The Archer’s Craft: Understanding Parts Of Recurve Bow

