
Regarding archery, the importance of properly tuning your bow is allowed. Whether you are a seasoned archer or just starting, ensuring that your bow is tuned correctly can significantly improve your overall performance and accuracy.
Tune a bow involves adjusting various components of the bow to optimize its performance.
It includes adjusting the draw weight, arrow rest position, string alignment, and cam synchronization, among other factors. You can improve arrow flight and consistency by fine-tuning these elements, improving accuracy and precision.
Not only does proper tune a bow enhance your shooting experience, but it also plays a crucial role in maintaining the longevity of your equipment. Regular maintenance and tuning prevent excessive wear and tear on the bow’s components, ensuring it performs optimally for years.
Whether you are an avid hunter or a competitive target shooter, investing time in understanding and practising proper tune a bow techniques will undoubtedly pay off. It allows you to maximize your shooting potential by minimizing inconsistencies caused by equipment imperfections.
In this section, we will delve into the various aspects of tune a bow and explore its significance in improving performance and accuracy. We will discuss common issues arising from poor tuning practices and provide practical tips on maintaining your bow for optimal results. So, let’s dive into the world of bow tuning and unlock its secrets to elevate your archery game to new heights!
Table of Contents
ToggleStep 1: Understanding the Basics How to Tune a Bow
For optimal performance and accuracy with your bow, it is crucial to understand the basics of bow tuning. Step-by-Step tune a bow process that involves adjusting various components of your bow to ensure proper arrow flight and consistency. Mastering this process can enhance your shooting experience and improve your overall accuracy.
The first step in the tune a bow process is gaining a solid understanding of the fundamental components of your bow. It includes familiarizing yourself with the riser, limbs, cams or wheels, strings, cables, and other essential parts. Each component is vital in how your bow performs and interacts with the arrow during the shot.
One key aspect of tune a bow is achieving optimal arrow flight. Arrow flight refers to how smoothly and consistently an arrow travels from when it leaves the string until it hits its target. Properly tuned bows will produce straight arrows without erratic movements or deviations.
Another critical concept in tune a bow is paper tuning. Paper tuning involves shooting an arrow through a sheet far from the bow’s rest. By analyzing the tear pattern on the paper, you can gain valuable insights into how your arrows are leaving the bow and make necessary adjustments to improve their flight.
By understanding these basic concepts of bow tuning – including its components, achieving optimal arrow flight, and utilizing paper tuning – you lay a solid foundation for further fine-tuning adjustments that will ultimately enhance your shooting performance. So, let’s dive into each step of this process to unlock the maximum potential of your equipment!
Step 2: Gathering the Necessary Tools and Equipment
Gathering the necessary tools and equipment is crucial to ensure a successful tune a bow process. These tools will make the process easier and help achieve optimal performance from your bow. One of the essential tools for tune a bow is a bow square. This tool allows you to measure and adjust various aspects of your bow, such as brace height and nocking point position. A bow square ensures your bow is properly aligned and tuned for maximum accuracy.
Nocking point pliers are another important tool to have in your arsenal. These pliers are specifically designed to help you install or adjust the nocking point on your bowstring. Proper placement of the nocking point is crucial for consistent arrow flight and overall shooting performance.
Additionally, having paper tuning setup equipment is highly recommended. Paper tuning involves shooting an arrow through a sheet of paper to analyze its flight characteristics. This setup typically includes a frame, paper targets, and tape or pins to secure the paper. By analyzing the tear pattern on the paper, you can make adjustments to your bow’s rest or other components for improved arrow flight.
Lastly, investing in high-quality bow tuning tools specific to your needs is worth it. There are various options available on the market that cater to different types of bows and tuning requirements. By gathering these essential tools and equipment – including a bow square, nocking point pliers, and a paper tuning setup -you will be well-prepared for the next step in achieving optimal performance from your bow through proper tuning techniques.
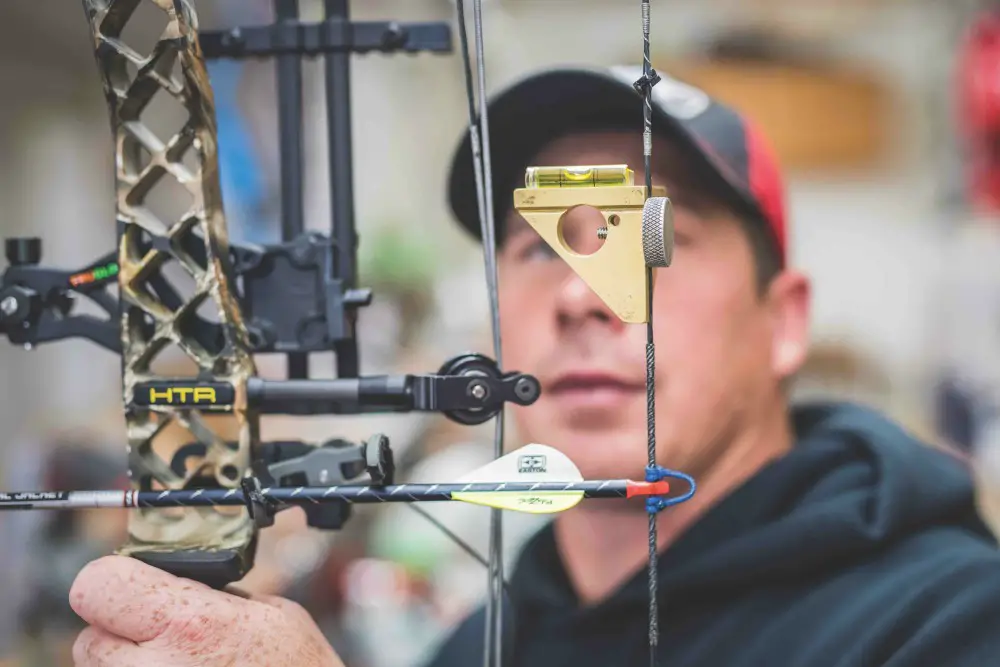
Step 3: Setting up the Nocking Point and Rest Position
Setting up the nocking point and rest position is crucial in achieving optimal accuracy and consistency in archery. Proper adjustment of the nocking point and positioning of the rest is essential for achieving a centre shot alignment, which directly impacts arrow flight.
The first step is to adjust the nocking point on the bowstring. The nocking point refers to the location where you attach your arrow to the string. It should be positioned to allow for the arrow’s straight and level release. It can be achieved by experimenting with different positions and observing how it affects arrow flight.
Next, it’s important to position the rest correctly. The rest is a device that supports the arrow before release. It should be aligned with the bowstring and riser, ensuring it sits at an appropriate height for consistent arrow clearance during shooting.
Achieving centre-shot alignment is crucial for accurate shooting. It means that when viewed from behind, your bowstring, arrow shaft, and riser should all line up perfectly in one vertical plane. Adjustments may need to be made to achieve this alignment, such as tweaking the position of your rest or making small changes to your bow’s setup.
By setting up your nocking point and rest position correctly, you’ll greatly improve your chances of achieving consistent accuracy in archery. Remember to fine-tune these adjustments based on personal preference and shooting style for optimal results on the range or out in nature.
Step 4: Adjusting the Brace Height and Draw Length
Achieving the perfect brace height and draw length is crucial for optimal performance and accuracy in archery. In this step, we will guide you through the process of adjusting both the brace height and draw length to ensure a comfortable and efficient shooting experience.
Firstly, let’s focus on adjusting the brace height. The brace height refers to the distance between the bowstring and the deepest part of the grip when the bow is at rest. It plays a significant role in determining arrow speed, string oscillation, and overall shooting feel. To adjust the brace height:
- Start by measuring it using a bow square or ruler designed for this purpose.
- Place one end of the ruler against your bow’s grip while ensuring it is parallel to your string.
- Take note of the measurement.
If your brace height is too high or too low based on manufacturer recommendations or personal preference, adjustments can be made by twisting or untwisting your bowstring. This process should be done gradually, making small adjustments to avoid over-tightening or loosening. For draw length adjustment, it is crucial to have a proper draw length for consistent accuracy and comfort during each shot. Draw length refers to how far you must pull back on the string before reaching full draw. To measure your current draw length accurately:
- Stand upright with your arms extended outwards parallel to the ground.
- Have someone measure from fingertip to fingertip across your chest while maintaining a relaxed posture.
- Divide this measurement by 2.5 to get an approximate estimate of your draw length.
Adjust your draw length by increasing or decreasing it based on personal preference or professional guidance from an experienced archer or technician. This adjustment can be made by changing modules or cams on compound bows or adjusting limb bolts on recurve bows.
Remember that both brace height and draw length adjustments should be made incrementally, testing each adjustment to gauge its impact on your shooting performance. It is advisable to seek guidance from a qualified archery professional if you are unsure or uncomfortable making these adjustments yourself. By adjusting your brace height and draw length properly, you can optimize your archery experience, improve accuracy, and ensure a comfortable shooting posture.
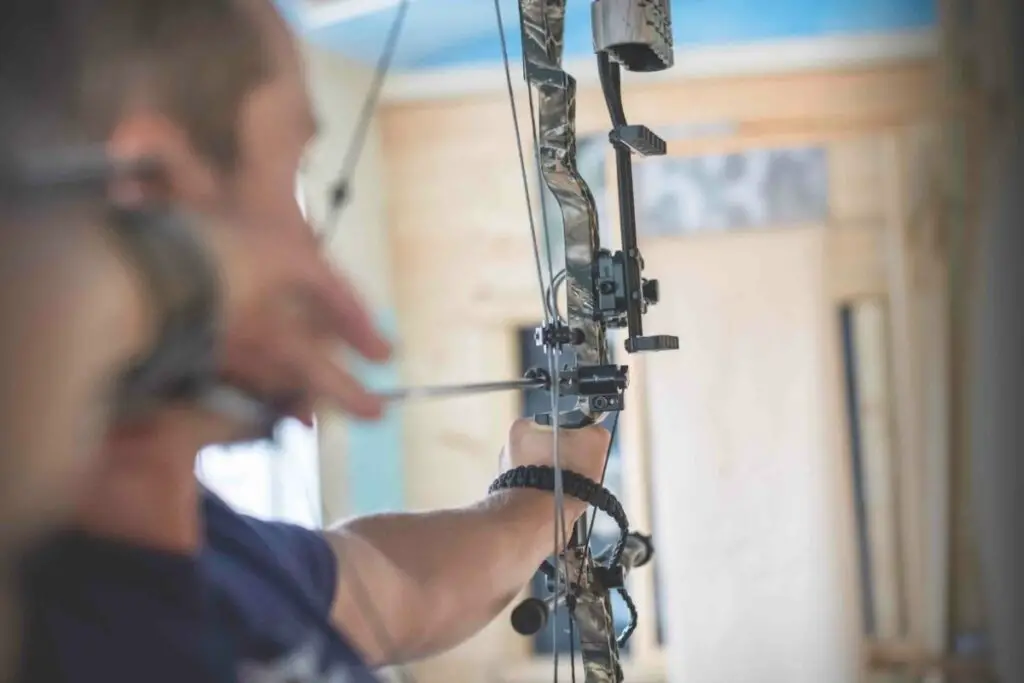
Step 5: Fine-tuning with Paper Tuning Techniques
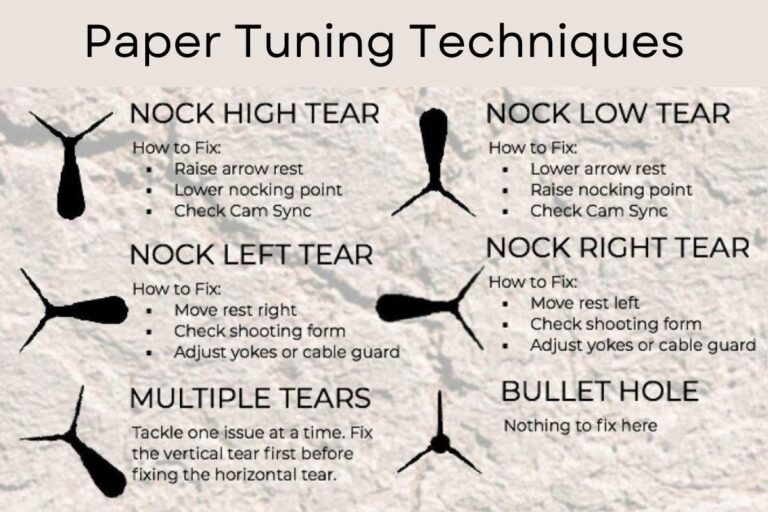
Once you have set up your bow and arrows, it’s time to fine-tune your setup for optimal performance. One effective technique for achieving this is through the process of paper tuning. By using the shooting through paper test and analyzing arrow tears, you can make precise adjustments to ensure that your arrows are flying straight and true.
The paper-tuning process involves shooting an arrow through a sheet of paper placed in front of a target. As the arrow passes through the paper, it leaves behind a tear pattern that provides valuable insights into its flight characteristics. You can identify any inconsistencies or anomalies affecting your arrow’s trajectory by carefully examining these tears.
Analyzing arrow tears allows you to adjust various aspects of your setup, such as bow tuning, arrow spine, and rest position. For example, if you notice a tear that is angled or tilted in a particular direction, it indicates that there may be an issue with the alignment or centre shot of your bow. You can achieve better arrow flight and accuracy by making small adjustments to these factors based on the tear patterns observed during paper tuning.
Fine-tuning with paper-tuning techniques helps improve accuracy and enhances consistency in shot placement. It enables you to identify and rectify any potential issues before they impact your performance on the field or at the range.
In conclusion, incorporating paper tuning into your archery routine is crucial for achieving optimal performance. By utilizing this technique and carefully analyzing arrow tears for necessary adjustments, you can fine-tune your setup to ensure consistent and accurate shots every time you release an arrow.
Troubleshooting Common Issues and Solutions in the Tune a Bow Process
Regarding bow tuning, it’s not uncommon to encounter a few hiccups. But fear not, as there are solutions to common issues that may arise during the process. This guide will address some of the most frequently encountered problems and provide troubleshooting tips to get your bow back in optimal shape.
One common issue that archers often face is bowstring twisting. It can lead to inconsistent arrow flight and accuracy. To tackle this problem, inspect your bowstring for any signs of wear or fraying. If you notice any damage, it may be time to replace the string. Additionally, ensure that your bowstring is properly aligned and centred on the cams or wheels of your bow.
Another issue that can cause frustration is excessive noise from your bow during shooting. It can be attributed to various factors, such as loose components or improper limb alignment. To address this problem, check all screws and bolts on your bow for tightness and ensure they are secure.
Additionally, consider using string silencers or limb dampeners to reduce vibrations and noise. Speaking of vibrations, excessive bow vibration can also affect shooting performance. It can be caused by incorrect brace height or limb alignment issues. Adjusting the brace height according to manufacturer recommendations can help minimize vibrations. If the problem persists, consult a professional archery technician who can assist with proper limb alignment.
By addressing these common issues in bow tuning promptly and effectively, you can ensure optimal performance and accuracy in your shooting experience. Always follow manufacturer guidelines and seek professional assistance for more complex problems.
Conclusion: Achieve Precision and Consistency by Mastering the Art of Bow Tuning
In conclusion, mastering the art of tune a bow is essential for achieving precision and consistency in archery. By understanding the importance of bow tuning and investing time in learning this skill, archers can greatly improve their performance on the field.
Bow tuning allows archers to optimize their equipment to suit their shooting style and preferences. It ensures the bow is properly aligned, balanced, and adjusted for optimal arrow flight. It enhances accuracy and minimizes arrow trajectory inconsistencies, resulting in tighter groupings and improved overall performance.
Consistency is key in archery, and tune a bow is crucial in achieving it. When properly tune a bow, it performs consistently shot after shot, reducing variables that can affect accuracy. It allows archers to have confidence in their equipment and focus on executing proper form and technique.
Furthermore, mastering the art of tune a bow enables archers to troubleshoot any issues with their equipment. By understanding how different adjustments affect arrow flight, they can quickly identify problems such as inconsistent arrow grouping or poor arrow penetration and make necessary adjustments to rectify them.
In summary, by dedicating time to learning and mastering the art of bow tuning, archers can achieve precision and consistency in their shooting. It empowers them to optimize their equipment for optimal performance while troubleshooting any potential issues along the way. So, whether you are a competitive archer or an enthusiast looking to improve your skills, consider the importance of tune a bow – it can make all the difference in your journey towards becoming a better archer.
1 thought on “5 Basic Steps To Tune A Bow With Advanced Techniques”
Comments are closed.